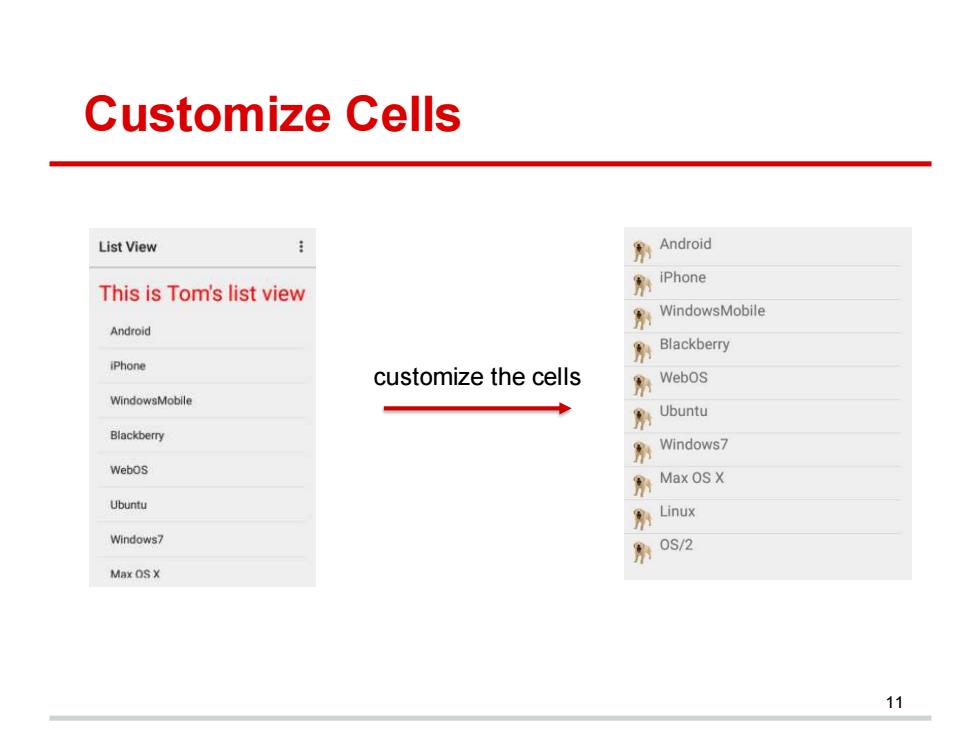
Customize Cells List View 形Android This is Tom's list view 形iPhone Android 养WindowsMobile 形Blackberry iPhone customize the cells 剂Webos WindowsMobile ◆ 为Ubuntu Blackberry 秀Windows7 Webos 界Max OSX Ubuntu Linux Windows7 剂0s2 Max OS X 11
Customize Cells 11 customize the cells
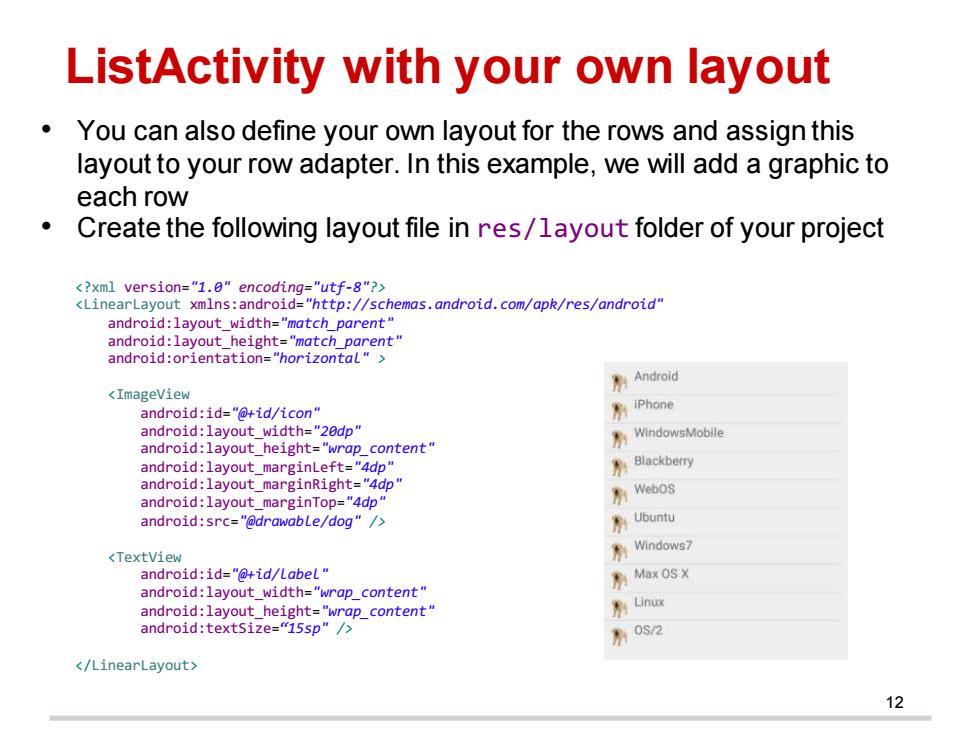
ListActivity with your own layout You can also define your own layout for the rows and assign this layout to your row adapter.In this example,we will add a graphic to each row Create the following layout file in res/layout folder of your project <?xml version="1.0"encoding="utf-8"?> <LinearLayout xmlns:android="http://schemas.android.com/apk/res/android" android:layout_width="match_parent" android:layout height="match parent" android:orientation="horizontaL"> Android <Imageview android:id="@+id/icon" 剂iPhone android:layout width="20dp" android:layout_height="wrap_content" WindowsMobile android:layout marginLeft="4dp" 为Blackberry android:layout marginRight="4dp" android:layout_marginTop="4dp" Webos android:src="@drawabLe/dog"/> 房Ubunty <TextView 寿Windows7 android:id="@+id/LabeL" 别Max OS android:layout_width="wrap_content" android:layout_height="wrap_content" 为Unux android:textsize="15sp"/> 扇0s2 </LinearLayout> 12
ListActivity with your own layout 12 <?xml version="1.0" encoding="utf-8"?> <LinearLayout xmlns:android="http://schemas.android.com/apk/res/android" android:layout_width="match_parent" android:layout_height="match_parent" android:orientation="horizontal" > <ImageView android:id="@+id/icon" android:layout_width="20dp" android:layout_height="wrap_content" android:layout_marginLeft="4dp" android:layout_marginRight="4dp" android:layout_marginTop="4dp" android:src="@drawable/dog" /> <TextView android:id="@+id/label" android:layout_width="wrap_content" android:layout_height="wrap_content" android:textSize=“15sp" /> </LinearLayout> • You can also define your own layout for the rows and assign this layout to your row adapter. In this example, we will add a graphic to each row • Create the following layout file in res/layout folder of your project
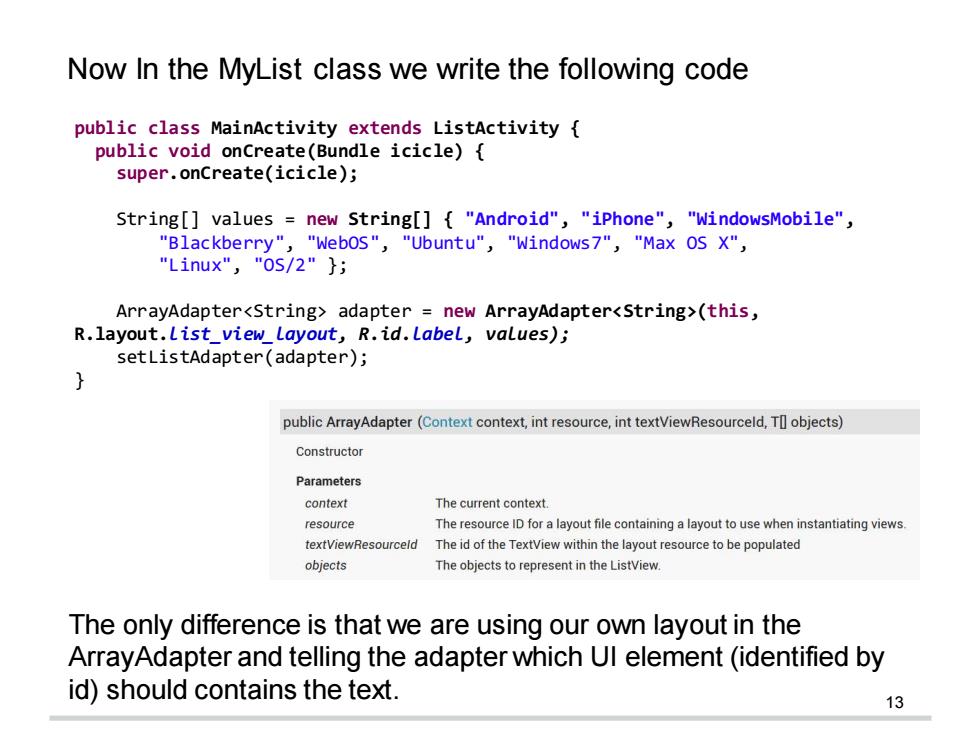
Now In the MyList class we write the following code public class MainActivity extends ListActivity public void onCreate(Bundle icicle){ super.onCreate(icicle); String[]values new String[]"Android","iPhone","WindowsMobile", "Blackberry","Webos","Ubuntu","Windows7","Max OS X", "Linux","OS/2"} ArrayAdapter<string>adapter new ArrayAdapter<string>(this, R.layout.List_view_Layout,R.id.Label,values); setListAdapter(adapter); public ArrayAdapter(Context context,int resource,int textViewResourceld,TI objects) Constructor Parameters context The current context. resource The resource ID for a layout file containing a layout to use when instantiating views. textViewResourceld The id of the TextView within the layout resource to be populated objects The objects to represent in the ListView. The only difference is that we are using our own layout in the ArrayAdapter and telling the adapter which Ul element(identified by id)should contains the text. 13
13 public class MainActivity extends ListActivity { public void onCreate(Bundle icicle) { super.onCreate(icicle); String[] values = new String[] { "Android", "iPhone", "WindowsMobile", "Blackberry", "WebOS", "Ubuntu", "Windows7", "Max OS X", "Linux", "OS/2" }; ArrayAdapter<String> adapter = new ArrayAdapter<String>(this, R.layout.list_view_layout, R.id.label, values); setListAdapter(adapter); } Now In the MyList class we write the following code The only difference is that we are using our own layout in the ArrayAdapter and telling the adapter which UI element (identified by id) should contains the text