ArrayAdapter<String>adapter new ArrayAdapter<string>(this, android.R.layout.simplelist item_1,values); 可坐 零145 /6403 B□G1:27AM ndroldListVlew CustomTwoLineListActivity Interiace January Red hello 7 the color red February Green world March Blue the color blue musart April May June July simple_list item1 simple list_item 2 simple_list_item_single_choice 6
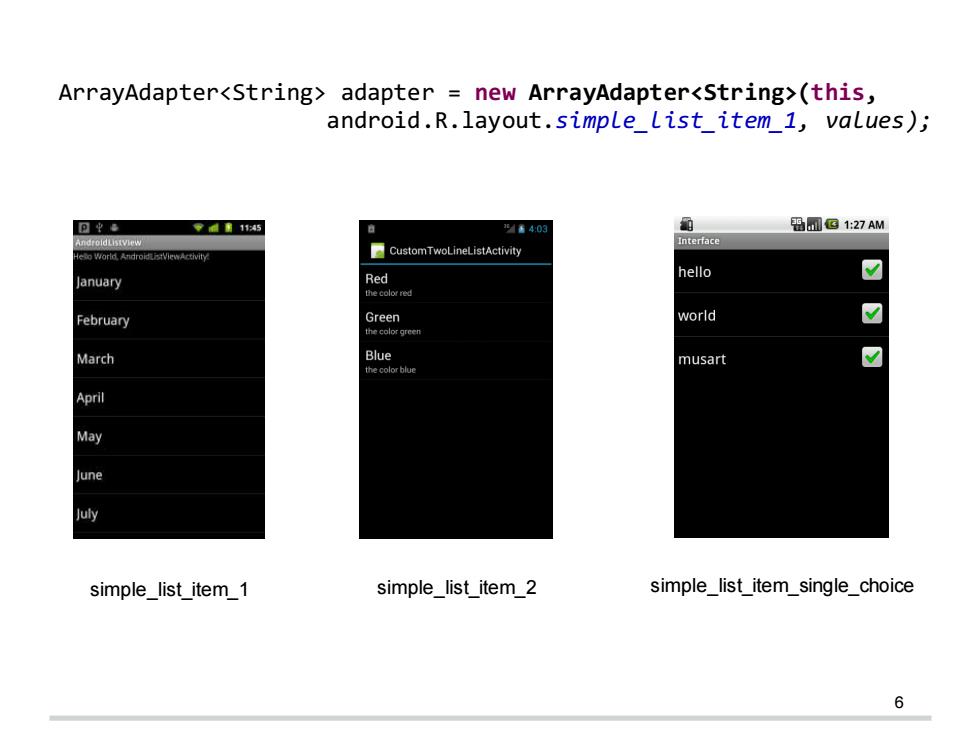
6 simple_list_item_1 simple_list_item_2 simple_list_item_single_choice ArrayAdapter<String> adapter = new ArrayAdapter<String>(this, android.R.layout.simple_list_item_1, values);
41108 ■ListDisplay User Interaction in List View Android iPhone WindowsMobile Blackberry User setListAdapter()to inflate Webos the list view using the adapter Ubuntu Windows7 If the user select in the list a list entry Max OSX the method onListItemclick() will be called.This method allows to access the selected element. @Override protected void onListItemClick(ListView 1,View v,int position,long id){ super.onListItemClick(1,v,position,id); /Callback function when an item in the list is clicked /ListView 1:The ListView where the click happened /View v:The view that was clicked within the ListView /int position:The position of the view in the list /long id:The row id of the item that was clicked
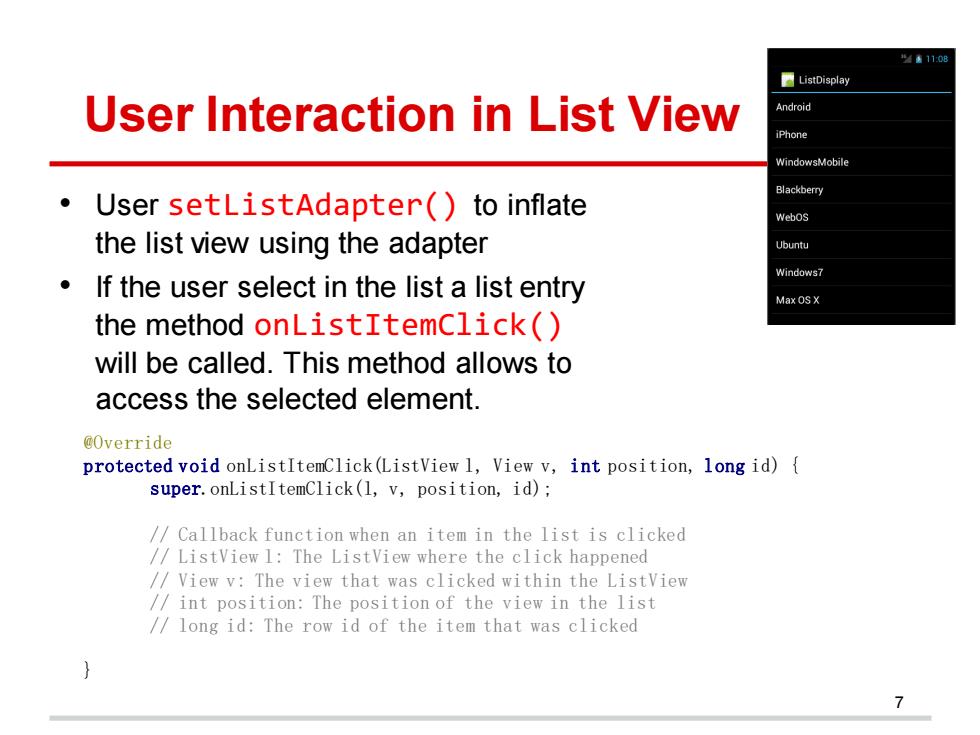
@Override protected void onListItemClick(ListView l, View v, int position, long id) { super.onListItemClick(l, v, position, id); // Callback function when an item in the list is clicked // ListView l: The ListView where the click happened // View v: The view that was clicked within the ListView // int position: The position of the view in the list // long id: The row id of the item that was clicked } User Interaction in List View • User setListAdapter() to inflate the list view using the adapter • If the user select in the list a list entry the method onListItemClick() will be called. This method allows to access the selected element. 7
"4110词 Android iPhone B副ac0ermy public class MainActivity extends ListActivity Ubuntu public void onCreate(Bundle savedInstanceState){ Windows7 Max O5 X super.onCreate(savedInstanceState); String[]values=new String[]{"Android","iPhone","Windows Mobile", "Blackberry","WebOS","Ubuntu","Windows 7","Max OS X", "Linux","Windows 8"}; ArrayAdapter<String>adapter new ArrayAdapter<String>(this, android.R.layout.simple list item 1,R.id.label,values); setListAdapter (adapter); @Override protected void onListItemClick(ListView 1,View v,int position,long id){ super.onListItemclick(1,v,position,id); String item=(String)getListAdapter().getItem(position); Toast.makeText(this,item +selected with position"+position +and id"+id, Toast.LENGTH LONG)show () 8
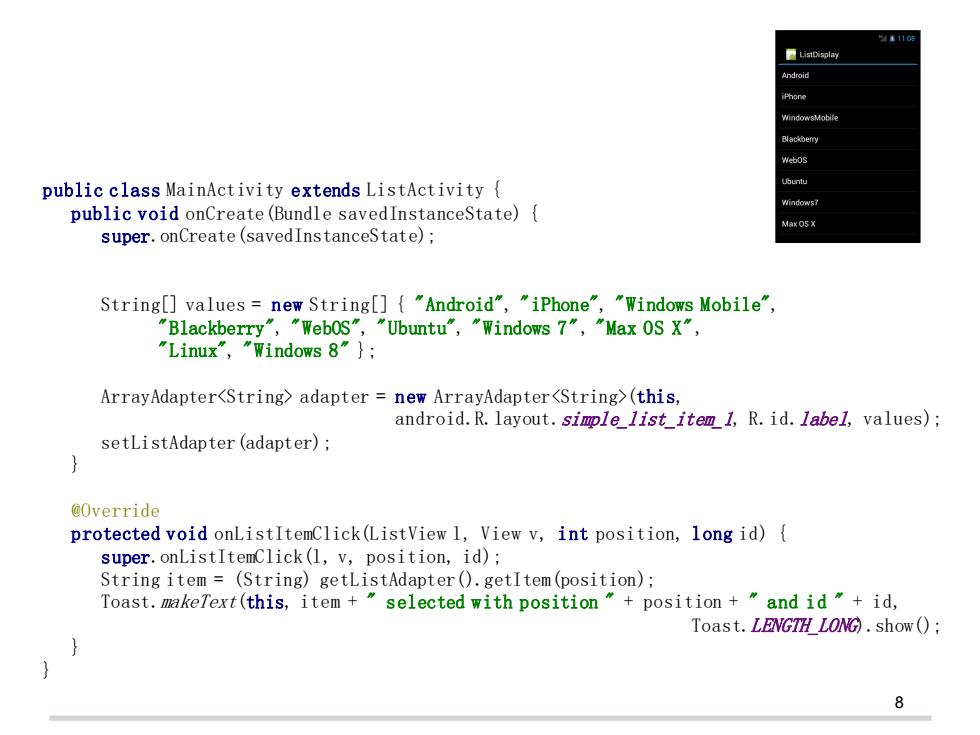
8 public class MainActivity extends ListActivity { public void onCreate(Bundle savedInstanceState) { super.onCreate(savedInstanceState); String[] values = new String[] { "Android", "iPhone", "Windows Mobile", "Blackberry", "WebOS", "Ubuntu", "Windows 7", "Max OS X", "Linux", "Windows 8" }; ArrayAdapter<String> adapter = new ArrayAdapter<String>(this, android.R.layout.simple_list_item_1, R.id.label, values); setListAdapter(adapter); } @Override protected void onListItemClick(ListView l, View v, int position, long id) { super.onListItemClick(l, v, position, id); String item = (String) getListAdapter().getItem(position); Toast.makeText(this, item + " selected with position " + position + " and id " + id, Toast.LENGTH_LONG).show(); } }
Apply Your Own Layout 811:08 List View ■ListDisplay Android This is Tom's list view iPhone Android WindowsMobile iPhone WindowsMobile Blackberry Blackberry Webos Webos Ubuntu Ubuntu Windows7 Windows7 Max OS X Max0S× Using default layout in Using your own ListActivity layout file 9
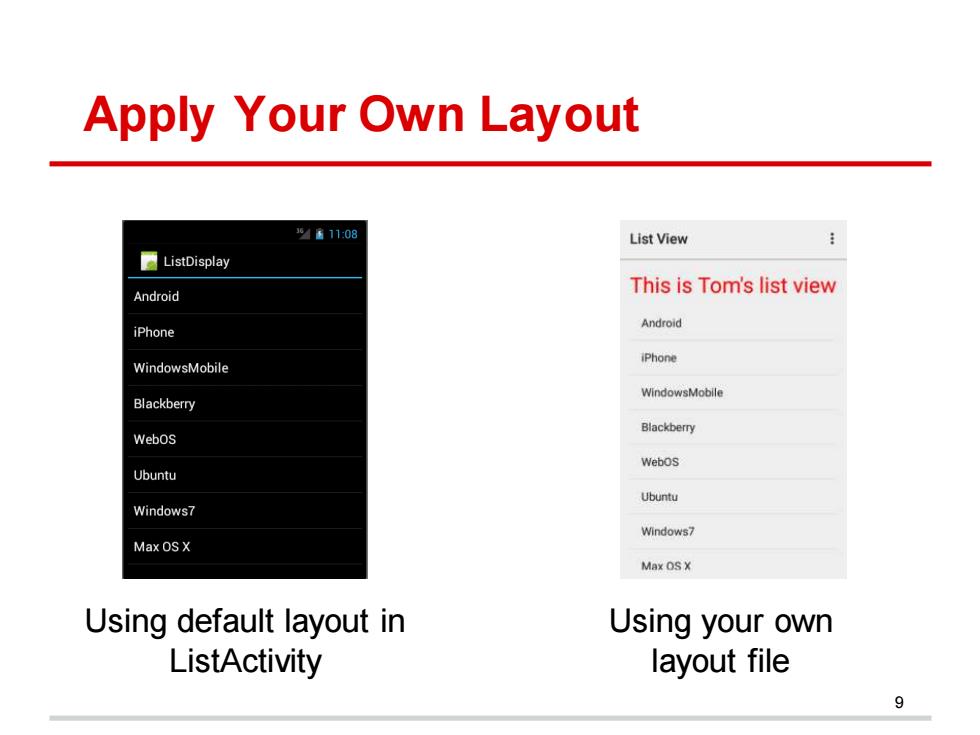
Apply Your Own Layout Using default layout in ListActivity 9 Using your own layout file

Customize List View <TextView In case you don't want to use android:layout_width="wrap_content" android:layout_height="wrap_content" one of the pre-defined layouts android:layout_marginBottom="20sp" android:gravity="center_horizontal" your own layout must have an android:text="This is Tom's list view" android:textColor="#f00" element with the id android:textSize="30sp"/> "@android:id/list"which is the <ListView ListView android:id="@android:id/list" android:layout_width="fill_parent" android:layout_height="wrap_content" android:layout_marginTop="50dp"/> In activity java file,still use the method setContentview() protected void onCreate(Bundle savedInstanceState){ super.onCreate(savedInstanceState); setContentview (R.layout.activity main); 10
Customize List View • In case you don't want to use one of the pre-defined layouts your own layout must have an element with the id "@android:id/list" which is the ListView • In activity java file, still use the method setContentView() 10 <TextView android:layout_width="wrap_content" android:layout_height="wrap_content" android:layout_marginBottom="20sp" android:gravity="center_horizontal" android:text="This is Tom's list view" android:textColor="#f00" android:textSize="30sp" /> <ListView android:id="@android:id/list" android:layout_width="fill_parent" android:layout_height="wrap_content" android:layout_marginTop="50dp"/> protected void onCreate(Bundle savedInstanceState) { super.onCreate(savedInstanceState); setContentView(R.layout.activity_main); }