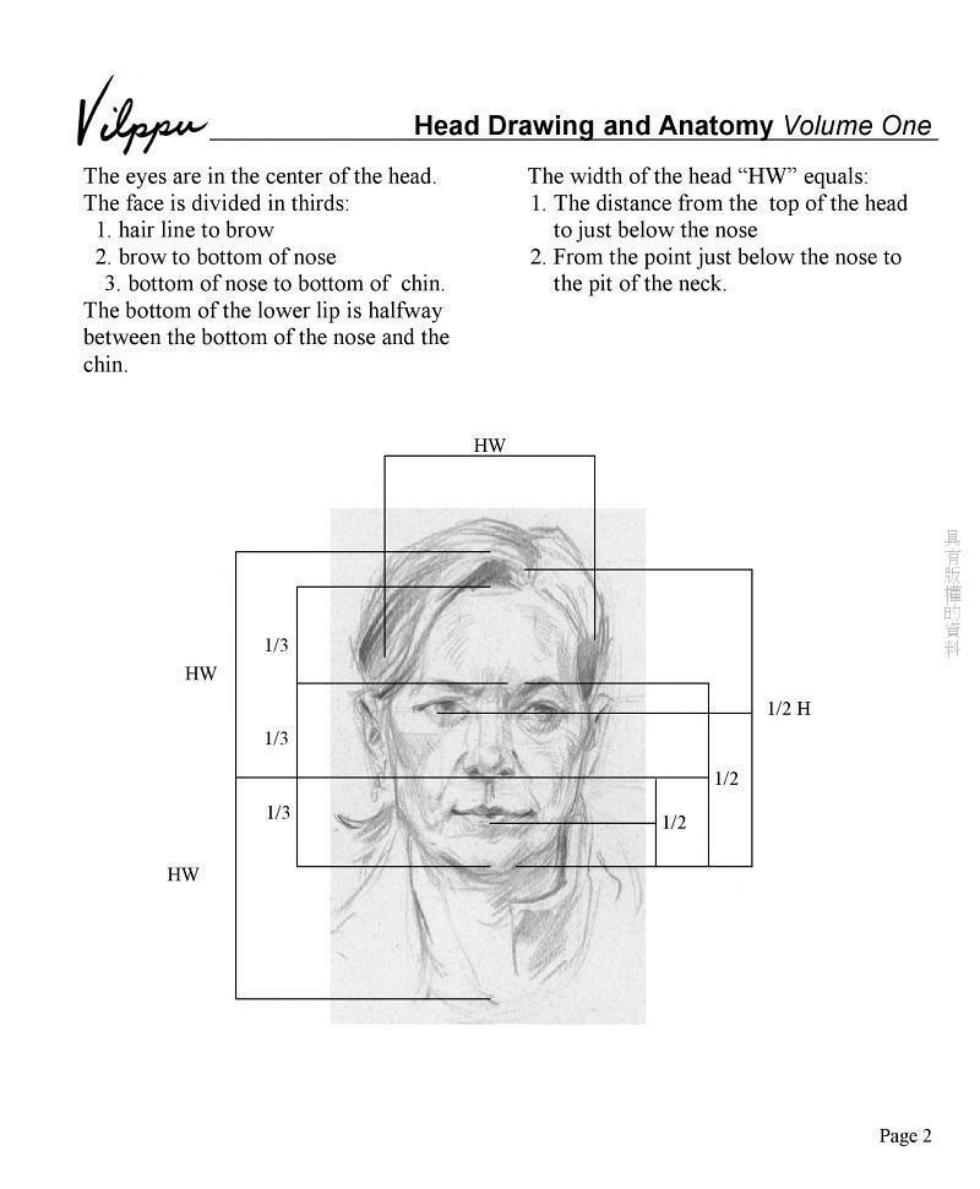
Head Drawing and Anatomy Volume One The eyes are in the center of the head The width of the head"HW"equals: The face is divided in thirds: 1.The distance from the top of the head 1.hair line to brow to just below the nose 2.brow to bottom of nose 2.From the point just below the nose to 3.bottom of nose to bottom of chin the pit of the neck. The bottom of the lower lip is halfway between the bottom of the nose and the chin. HW 具有版的科 1/3 HW 1/2H 1/3 1/3 1/2 HW Page 2
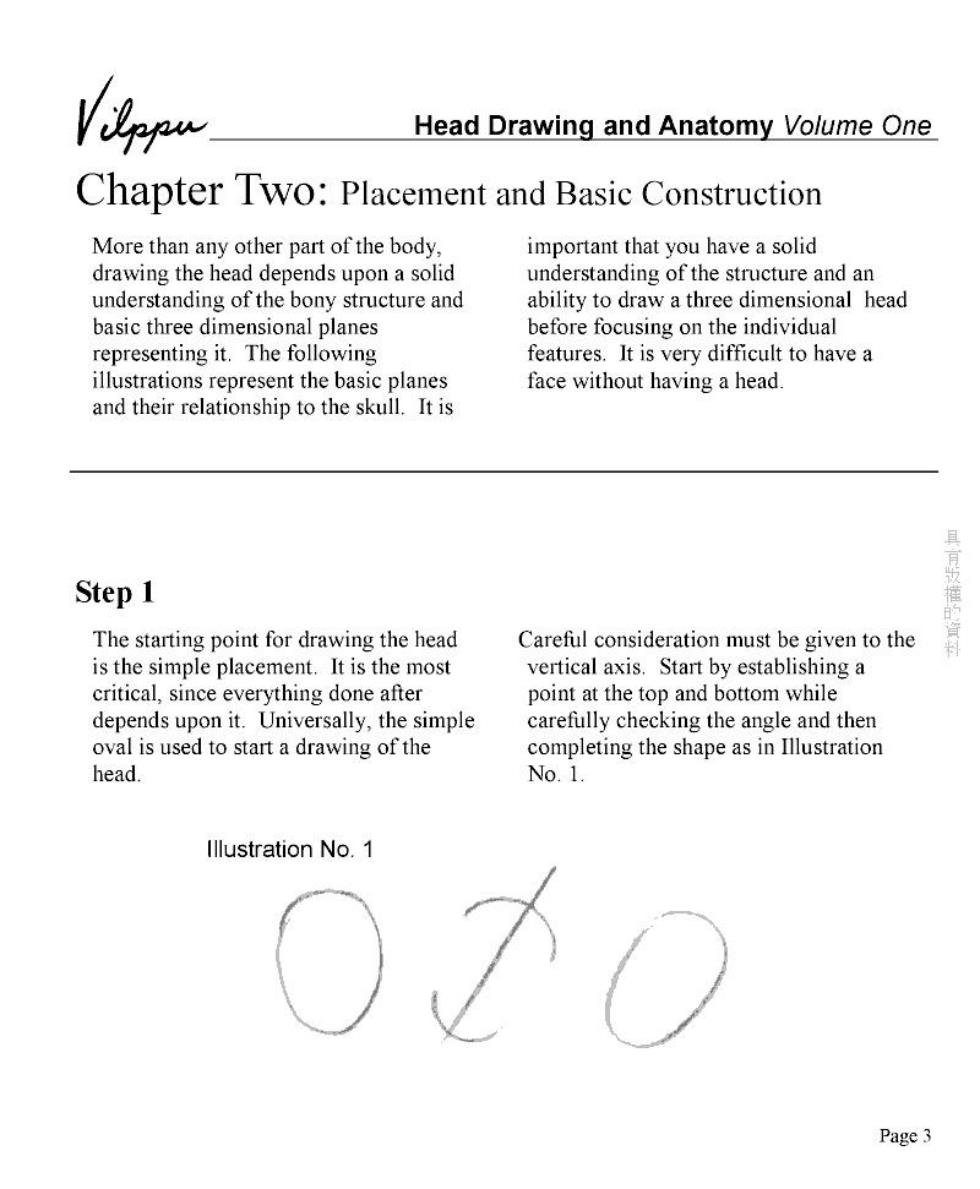
Head Drawing and Anatomy Volume One Chapter Two:Placement and Basic Construction More than any other part of the body important that you have a solid drawing the head depends upon a solid understanding of the structure and an understanding of the bony structure and ability to draw a three dimensional head basic three dimensional planes before focusing on the individual representing it.The following features.It is very difficult to have a illustrations represent the basic planes face without having a head. and their relationship to the skull.It is Step 1 The starting point for drawing the head Careful consideration must be given to the is the simple placement.It is the most vertical axis.Start by establishing a critical,since everything done after point at the top and bottom while depends upon it.Universally,the simple carefully checking the angle and then oval is used to start a drawing of the completing the shape as in Illustration head. No.1. Illustration No.1 Page3

Head Drawing and Anatomy Volume One Step 2 The next step is to establish the tilt of the one side or the other clearly. head.Again,the universal way this is done is by drawing an ellipse at a right To see the tilt,we use a simple angle to the central axis of the head comparison of points.In Illustration No (Illustration No.2).Again,this looks 3,we see that the top and bottom of the very simple,but must be done with care ear line up with the brow line and the It is often difficult to see the tilt of the bottom of the nose. head up or down,along with it's tilt to lllustration No.3 Illustration No.2 Illustration No.4 shows how comparing the one created by drawing a line from A these points helps us to see the angle of to C.Drawing a line across from the the tilt of the head.Start by carefully bottom of one ear to the other (D to E) looking at the point of the corner of the and noticing the placement of the bottom brow (A),and the line created to the top of the nose(F)will also give you the of the ear at B.Compare this angle to same results. Illustration No.4
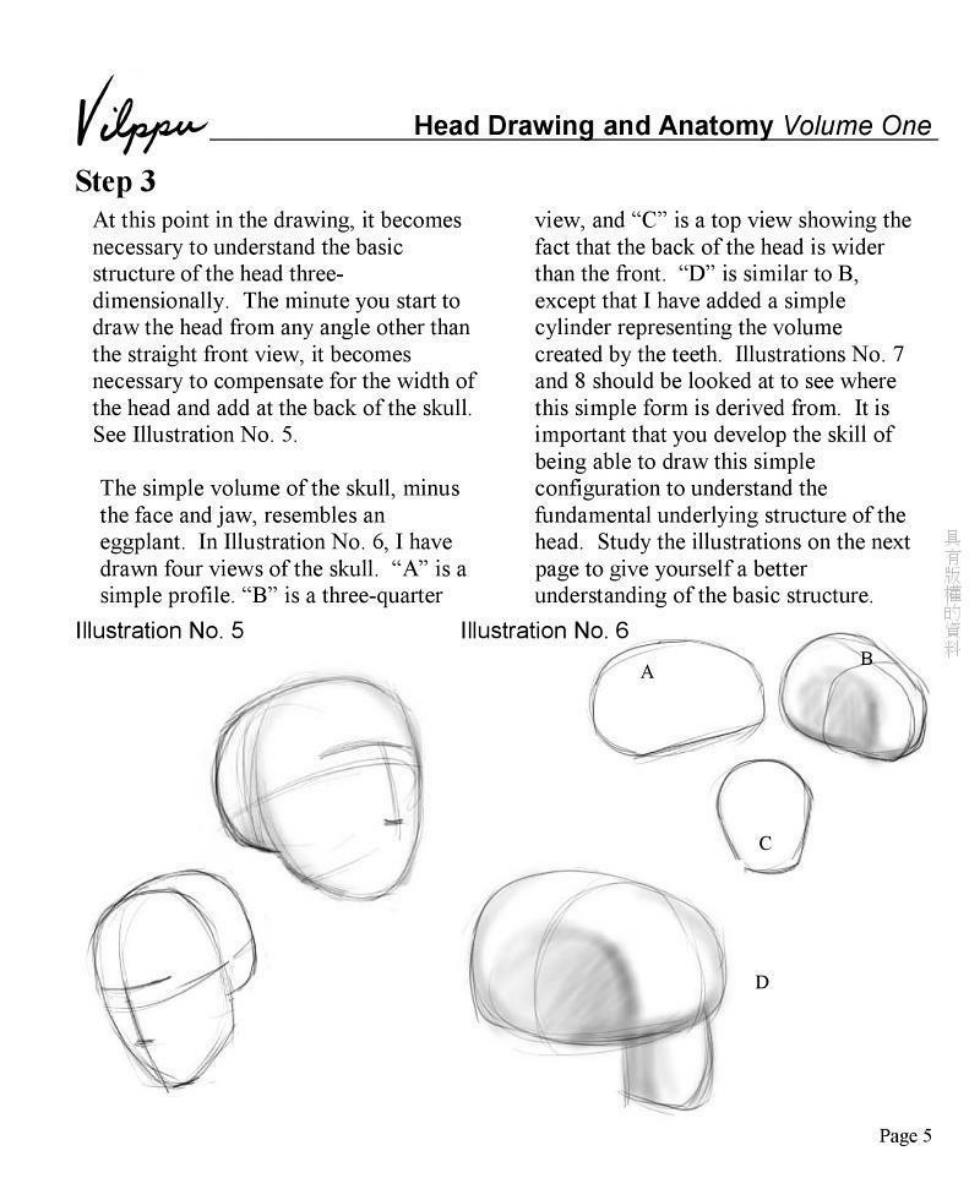
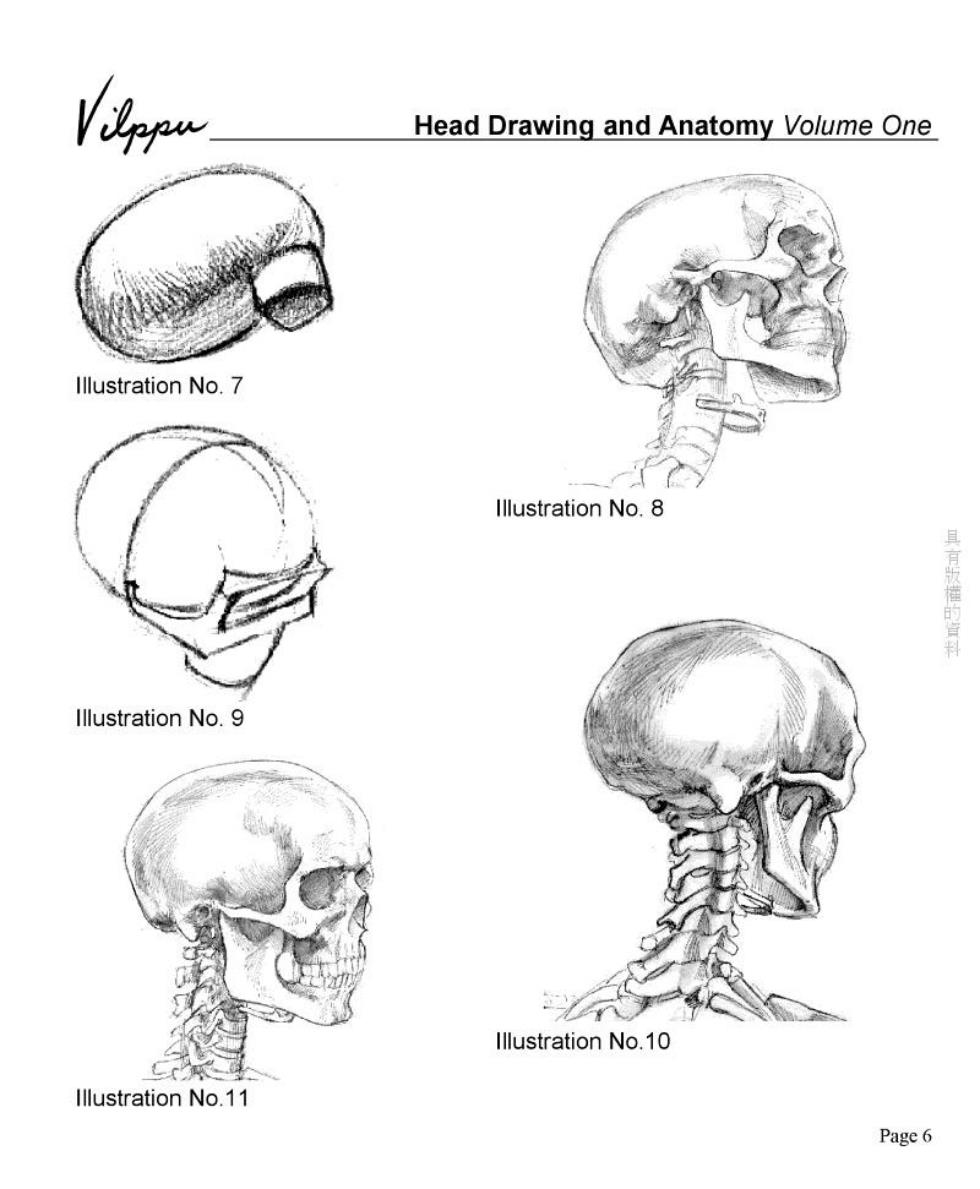
Head Drawing and Anatomy Volume One Step 3 At this point in the drawing,it becomes view,and“C”is a top view showing the necessary to understand the basic fact that the back of the head is wider structure of the head three- than the front.“D”is similar to B, dimensionally.The minute you start to except that I have added a simple draw the head from any angle other than cylinder representing the volume the straight front view,it becomes created by the teeth.Illustrations No.7 necessary to compensate for the width of and 8 should be looked at to see where the head and add at the back of the skull. this simple form is derived from.It is See Illustration No.5. important that you develop the skill of being able to draw this simple The simple volume of the skull,minus configuration to understand the the face and jaw,resembles an fundamental underlying structure of the eggplant.In Illustration No.6,I have head.Study the illustrations on the next drawn four views of the skull.“A”isa page to give yourself a better simple profile.“B”is a three-quarter understanding of the basic structure. Illustration No.5 Illustration No.6 A Page 5
Head Drawing and Anatomy Volume One Illustration No.7 Illustration No.8 具有版播的填科 Illustration No.9 Illustration No.10 Illustration No.11 Page 6