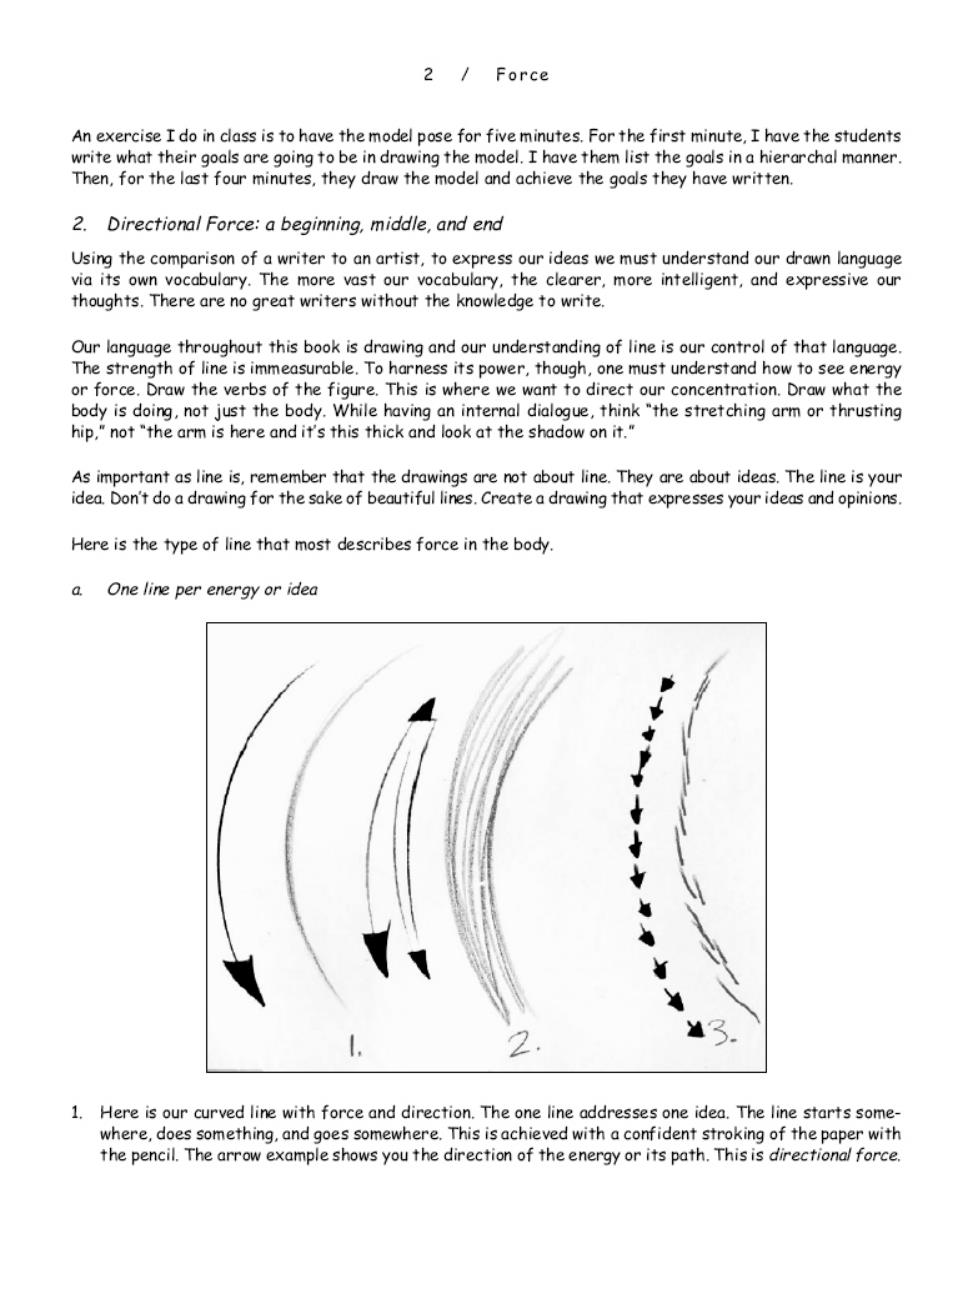
2/Force An exercise I do in casst the mod pose for five minutesFo thes minute.I have the students write what their oals are ng to be in drawing the model.I have them list the go Then,for the last four minutes.they draw the model and achieve the goals they have written. 2.Directional Force:a beginning,middle,and end ess our ideas we must understand ou the clear thoughts.There are no great writers without the knowledge to write. out this book is dr and our understanding of line is our cor trol of that lo nd how+ee。n or force.Draw the verbs of the figure.This is where we want to direct our concentration.Draw what the body is doing,not just the body.While having an internal dialogue,think"the stretching arm or thrusting hip,"not "the arm is here and it's this thick and look at the shadow on it." As important as line is,remember that the drawings are not about line.They are about ideas.The line is your idea Don't do a drawing for the sake of beautiful lines.Create a drawing that expresses your ideas and opinions. Here is the type of line that most describes force in the body. a.One line per energy or idea 1.Here is our curved line with force and directi The one line addresses one idea.The line starts som the l The and goes som ampie hows you the d etion of the energy of r its po

Michael D.Mattesi\3 2.This is our first student habit.It is sketchy and created by backward and forward motion.No direction. The line.or more importantly,its idea,does not start somewhere.have a purpose,and go somewhere. There is no clear idea. This is the infamous hairy line.Uncertainty takes us from one place to another through thousands of minuscule thoughts instead of drawing one line per idea Doing this never gives you the opportunity to move on to bigger issues or feel force and direction in your hand and mind. n't have to get it right the irst fi er your na sweep over the rections the moc absor the pose'si poper's surface the penci while you are still in motion e to the paper with scipline of mark making ere energy is com e aggressive b. Draw small,think big mitted to to d nd think big.Eve piles onto this foundation Disne many of the eat animators would thumbnail their sce es out first This isagreat way to see the big picture or whole story.It is also easy to make changes at this time. In the follow of the pose.If vings should be about.the main ideaf es that are o other,one convex and one concave.to see which resembles the figure's main force the most.One of the curves will fit into the puzzle in front of you and the other will be opposing the models movement.They are generic now,but this will give you an introduction to force.These drawings are usually done in thirty seconds to five minutes.The first force you should look for is the one that tells us the idea behind the connection between the ribcage and the pelvis.Here are some thirty-second drawings to show you my initial reaction to the model's movements
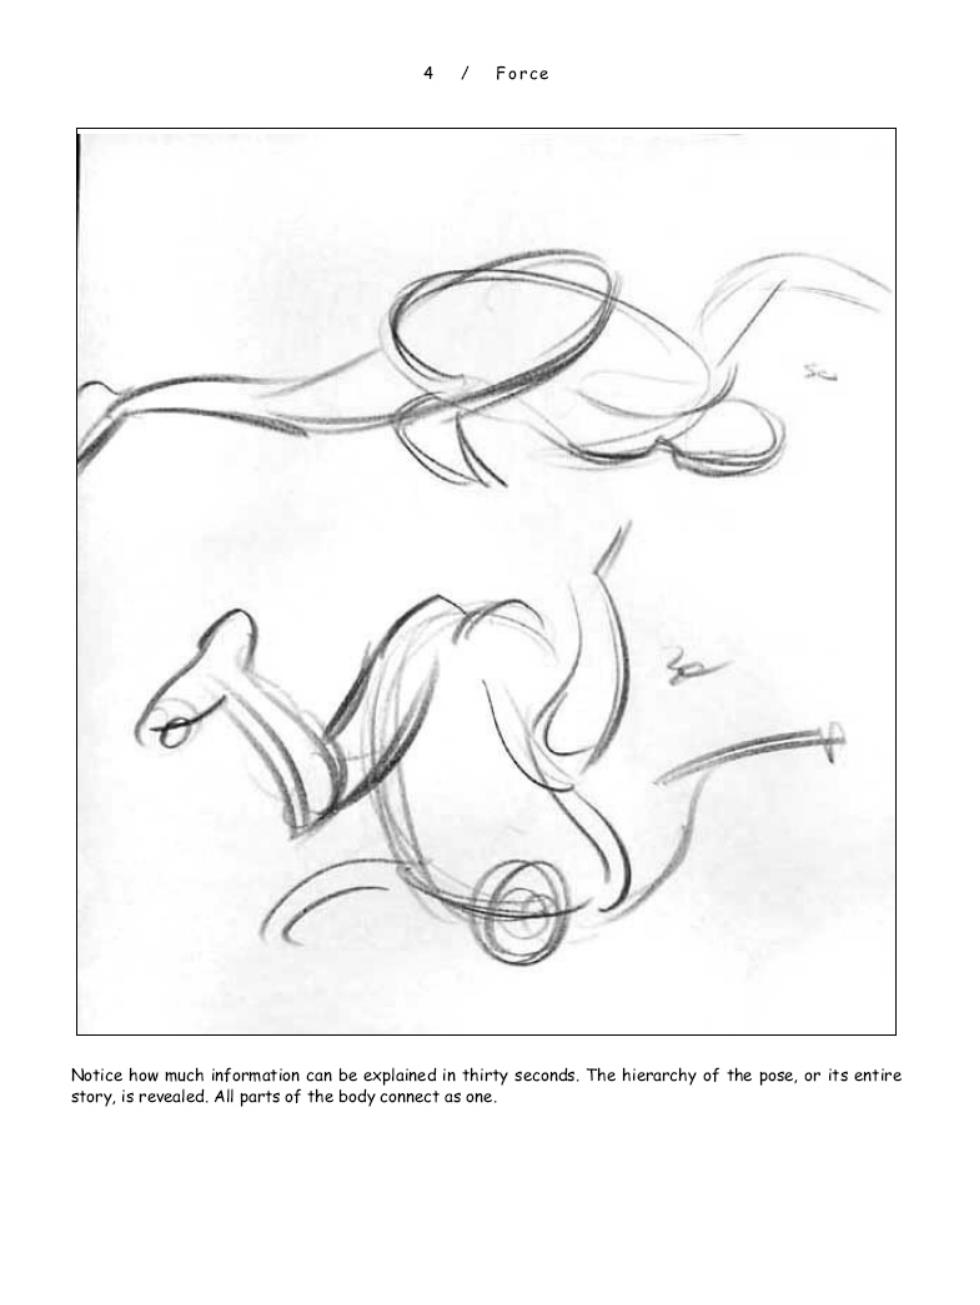
4/Force Notice how much information can be explained in thirty seconds.The hierarchy of the pose.or its entire story.is revealed.All parts of the body connect as one
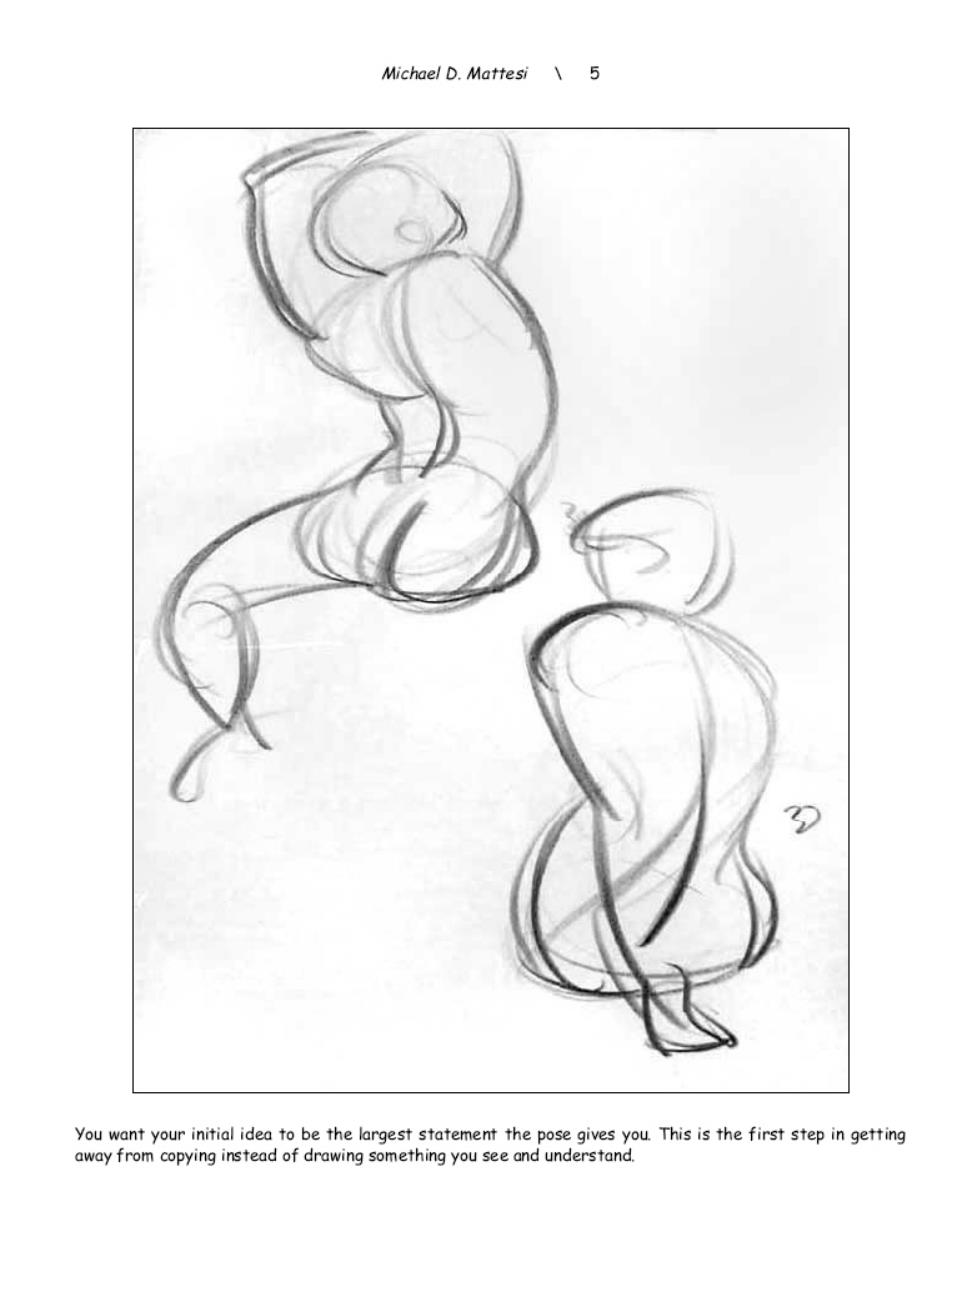
Michael D.Mattesi\5 away from c
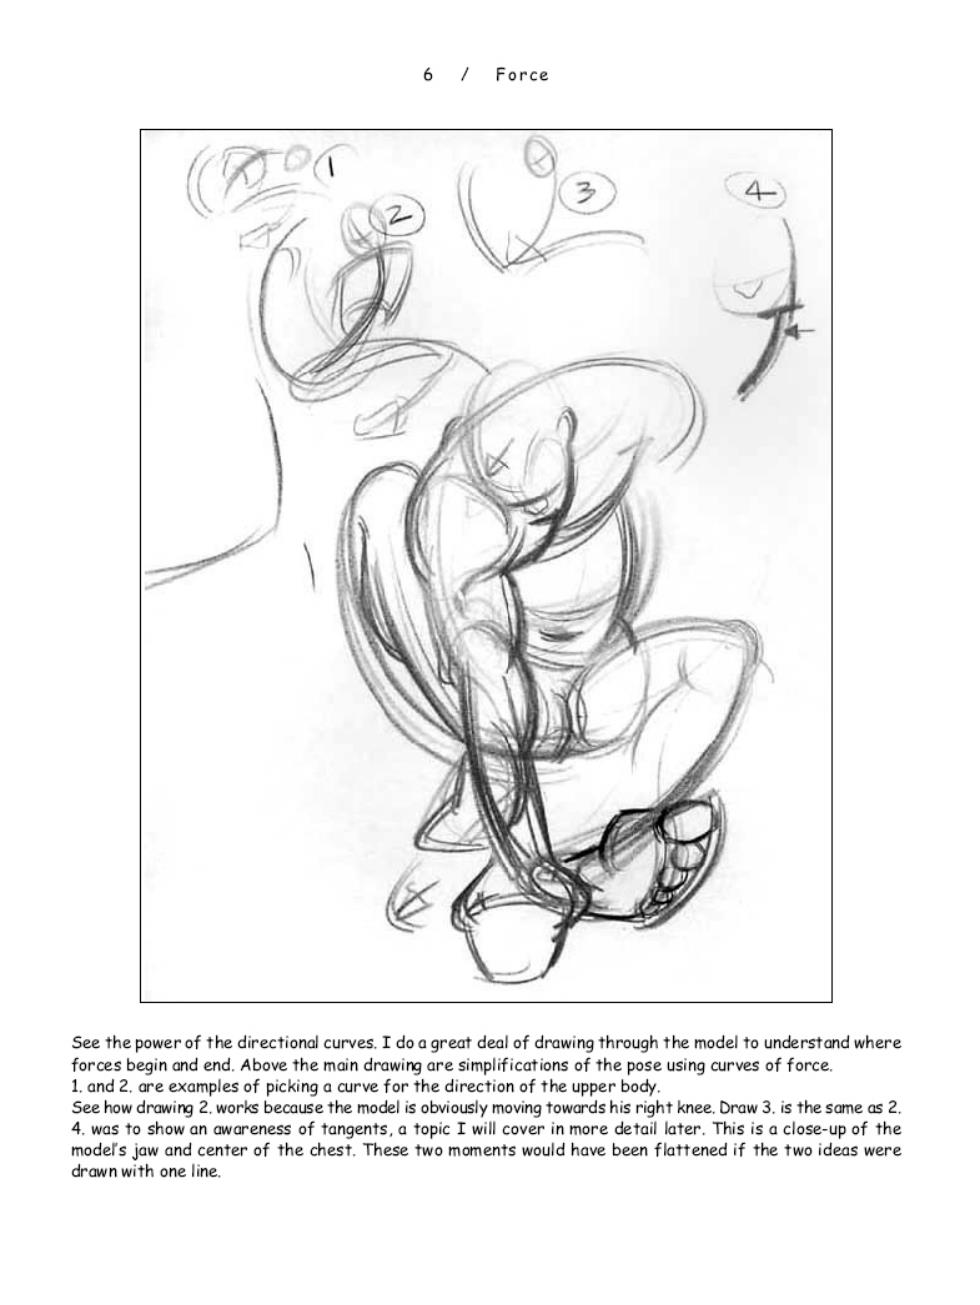
6/Force 00M 3 4 062 See the power of the directional curves.I do a great deal of drawing through the model to understand where forces begin and end.Above the main drawing are simplifications of the pose using curves of force. 1.and 2.are examples of picking a curve for the direction of the upper body. See how drawing 2.works because the model is obviously moving towards his right knee.Draw 3.is the same as 2. 4.was to show an awareness of tangents,a topic I will cover in more detail later.This is a close-up of the model's jaw and center of the chest.These two moments would have been flattened if the two ideas were drawn with one line